
DLP463
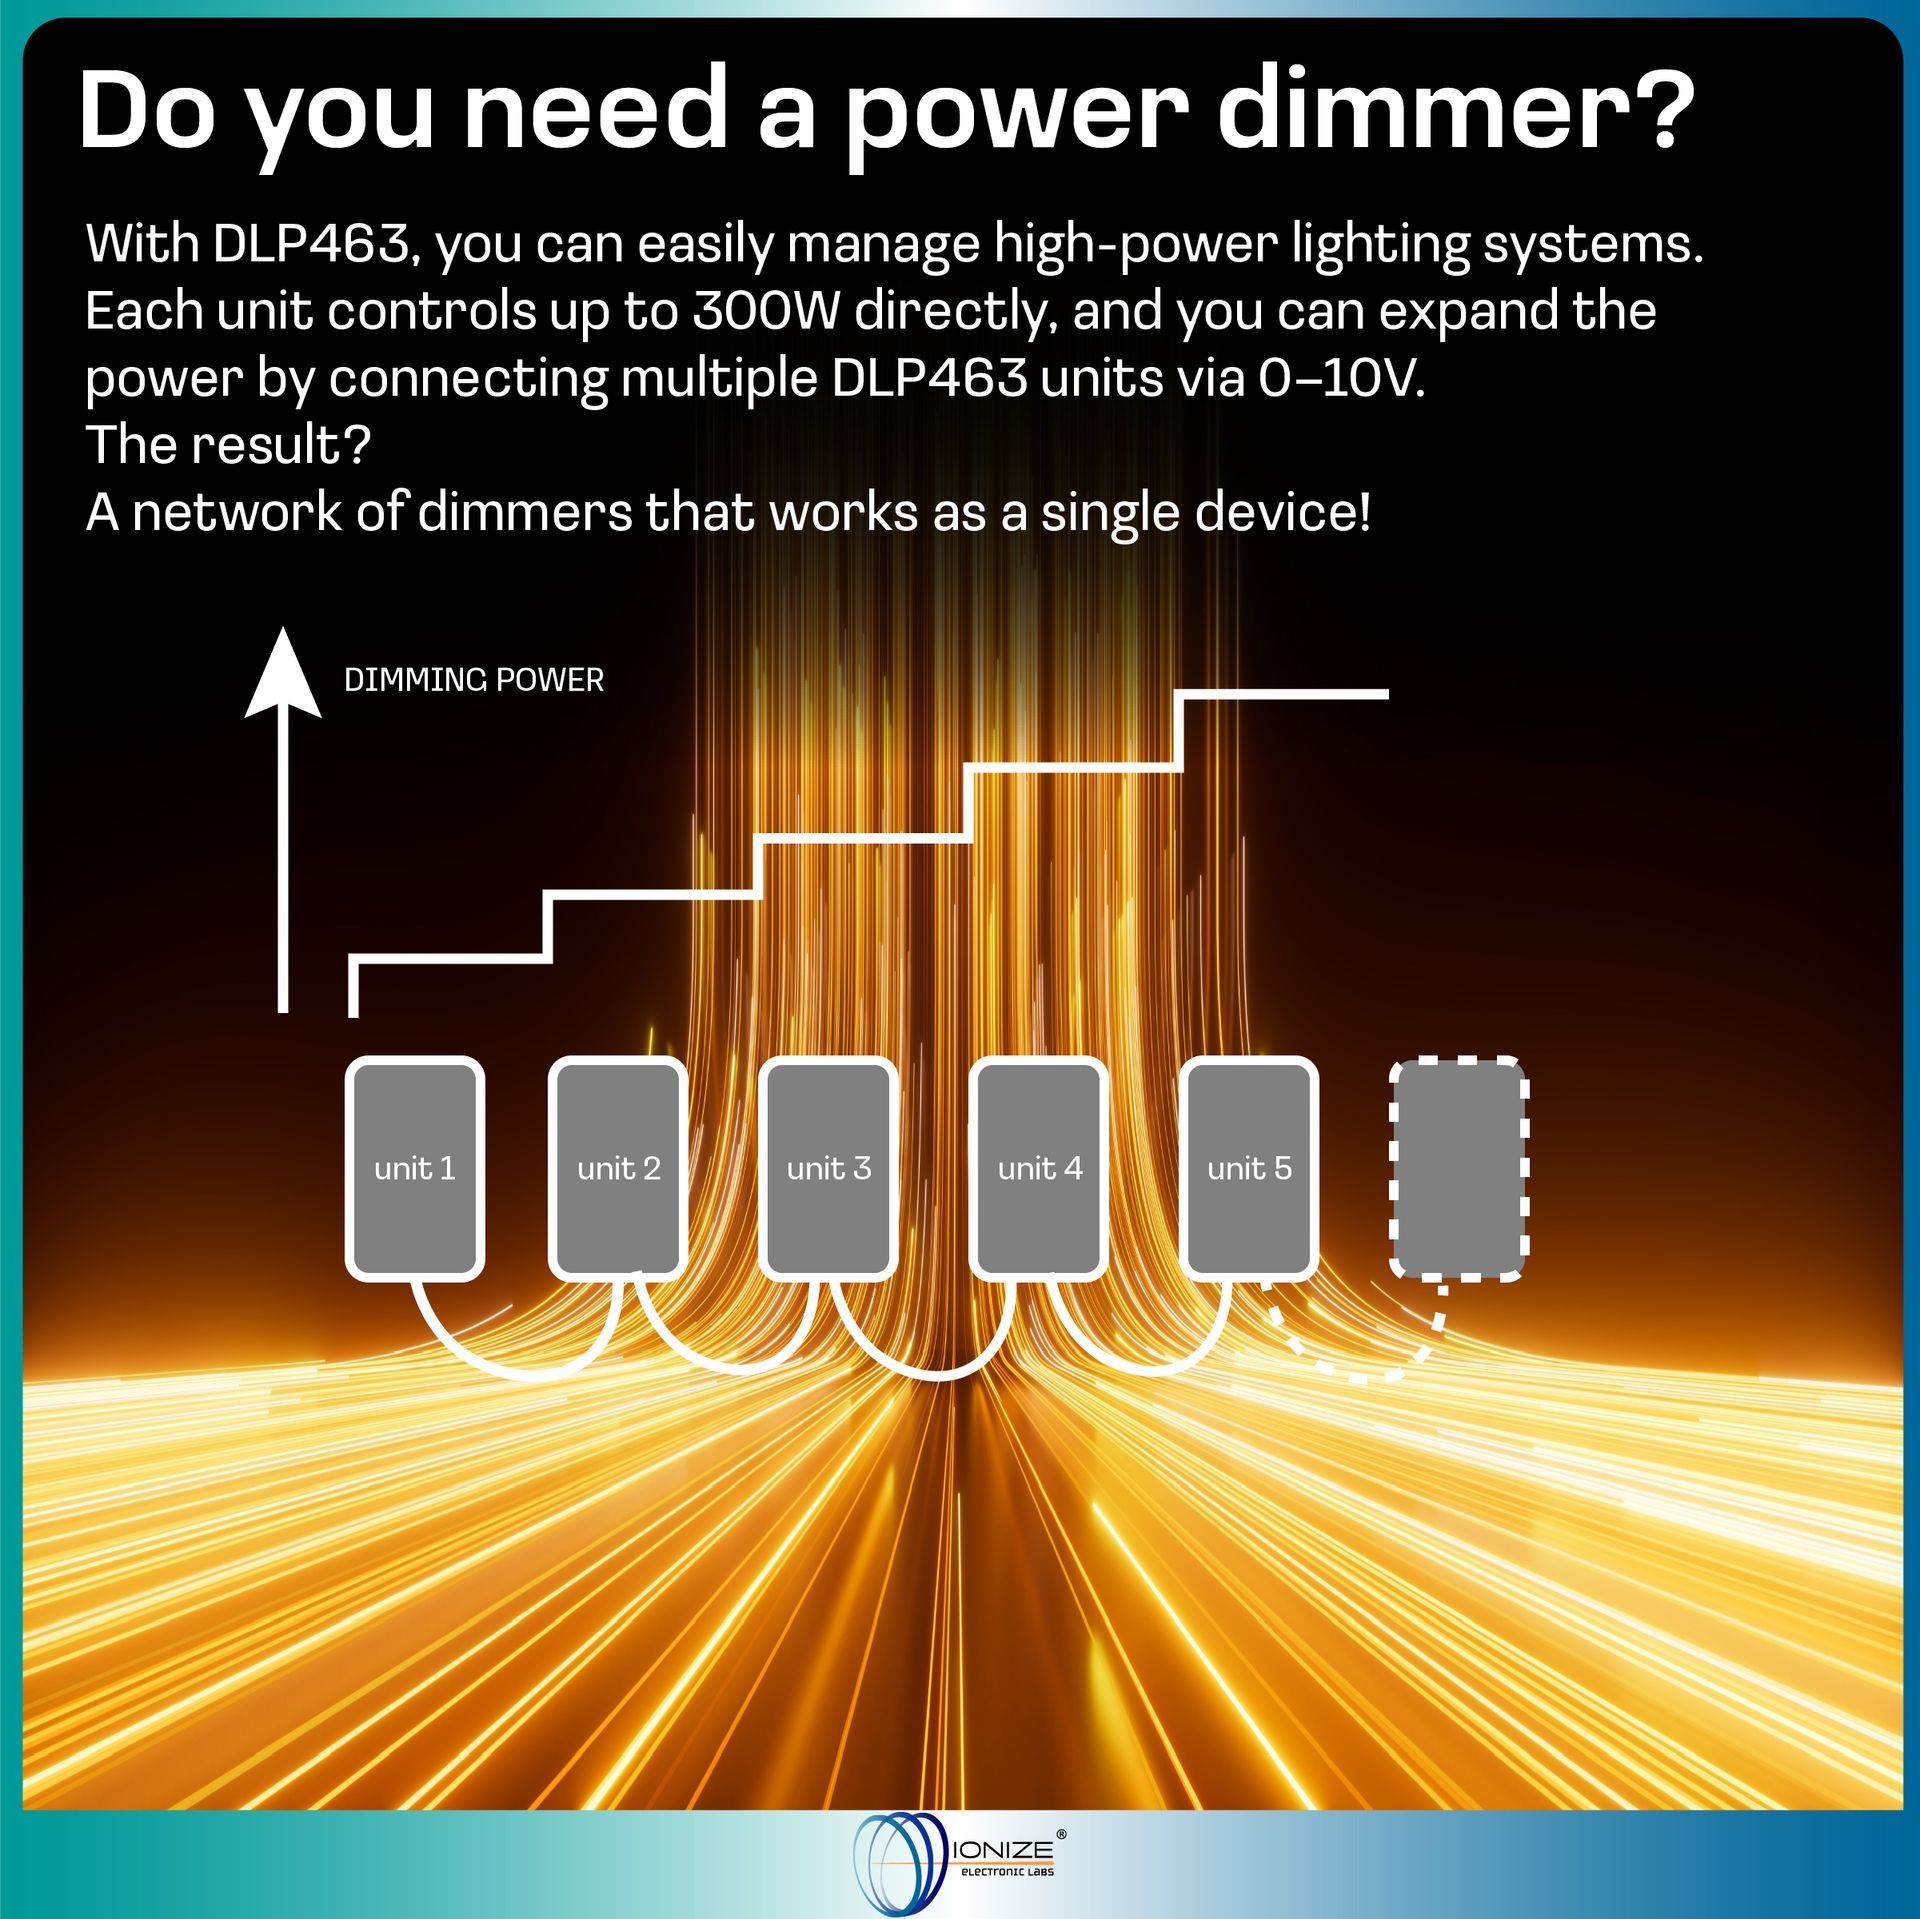
The DLP463 is a power dimmer and 0-10V signal controller. It can control the brightness of the load based on the command received from a button (dimmer operation) or based on the level of the 0-10V analog signal (driver operation). Finally, it can also generate the 0-10V line signal to control other devices (dimmer/controller operation). Unlike traditional Master/Slave systems consisting of two separate devices, the DLP463 integrates both signal control and power actuation in a single DIN rail module. Why choose the DLP463? Overcome power limits: Traditional dimmers often have a physical load limit (e.g. 300W). With the DLP463, this limit disappears. By connecting the devices together via the 0-10V bus, the control signal is instantly replicated on all units in the network. This allows you to divide a huge load across multiple DIN rails, maintaining perfect lighting synchronization with a single control button. Adaptability: If you don't connect buttons, it works as a pure driver (slave); with buttons, it becomes a smart dimmer or a master that controls other devices to increase the total power of the system. Visual Comfort: The SoftStart and SoftStop functions ensure gradual on and off, protecting your eyesight and the connected components. Reliability: The PC-ABS plastic case is self-extinguishing (UL 94 V-0) and the device is protected against reverse polarity on the 0-10V line. Perfect for home automation, offices and commercial spaces where granular and professional management of LED strips and resistive loads is required.
Available now
Technical features
- Power supply: 230 Vac 50 Hz
- Operating temperature: -5 to 35 °C
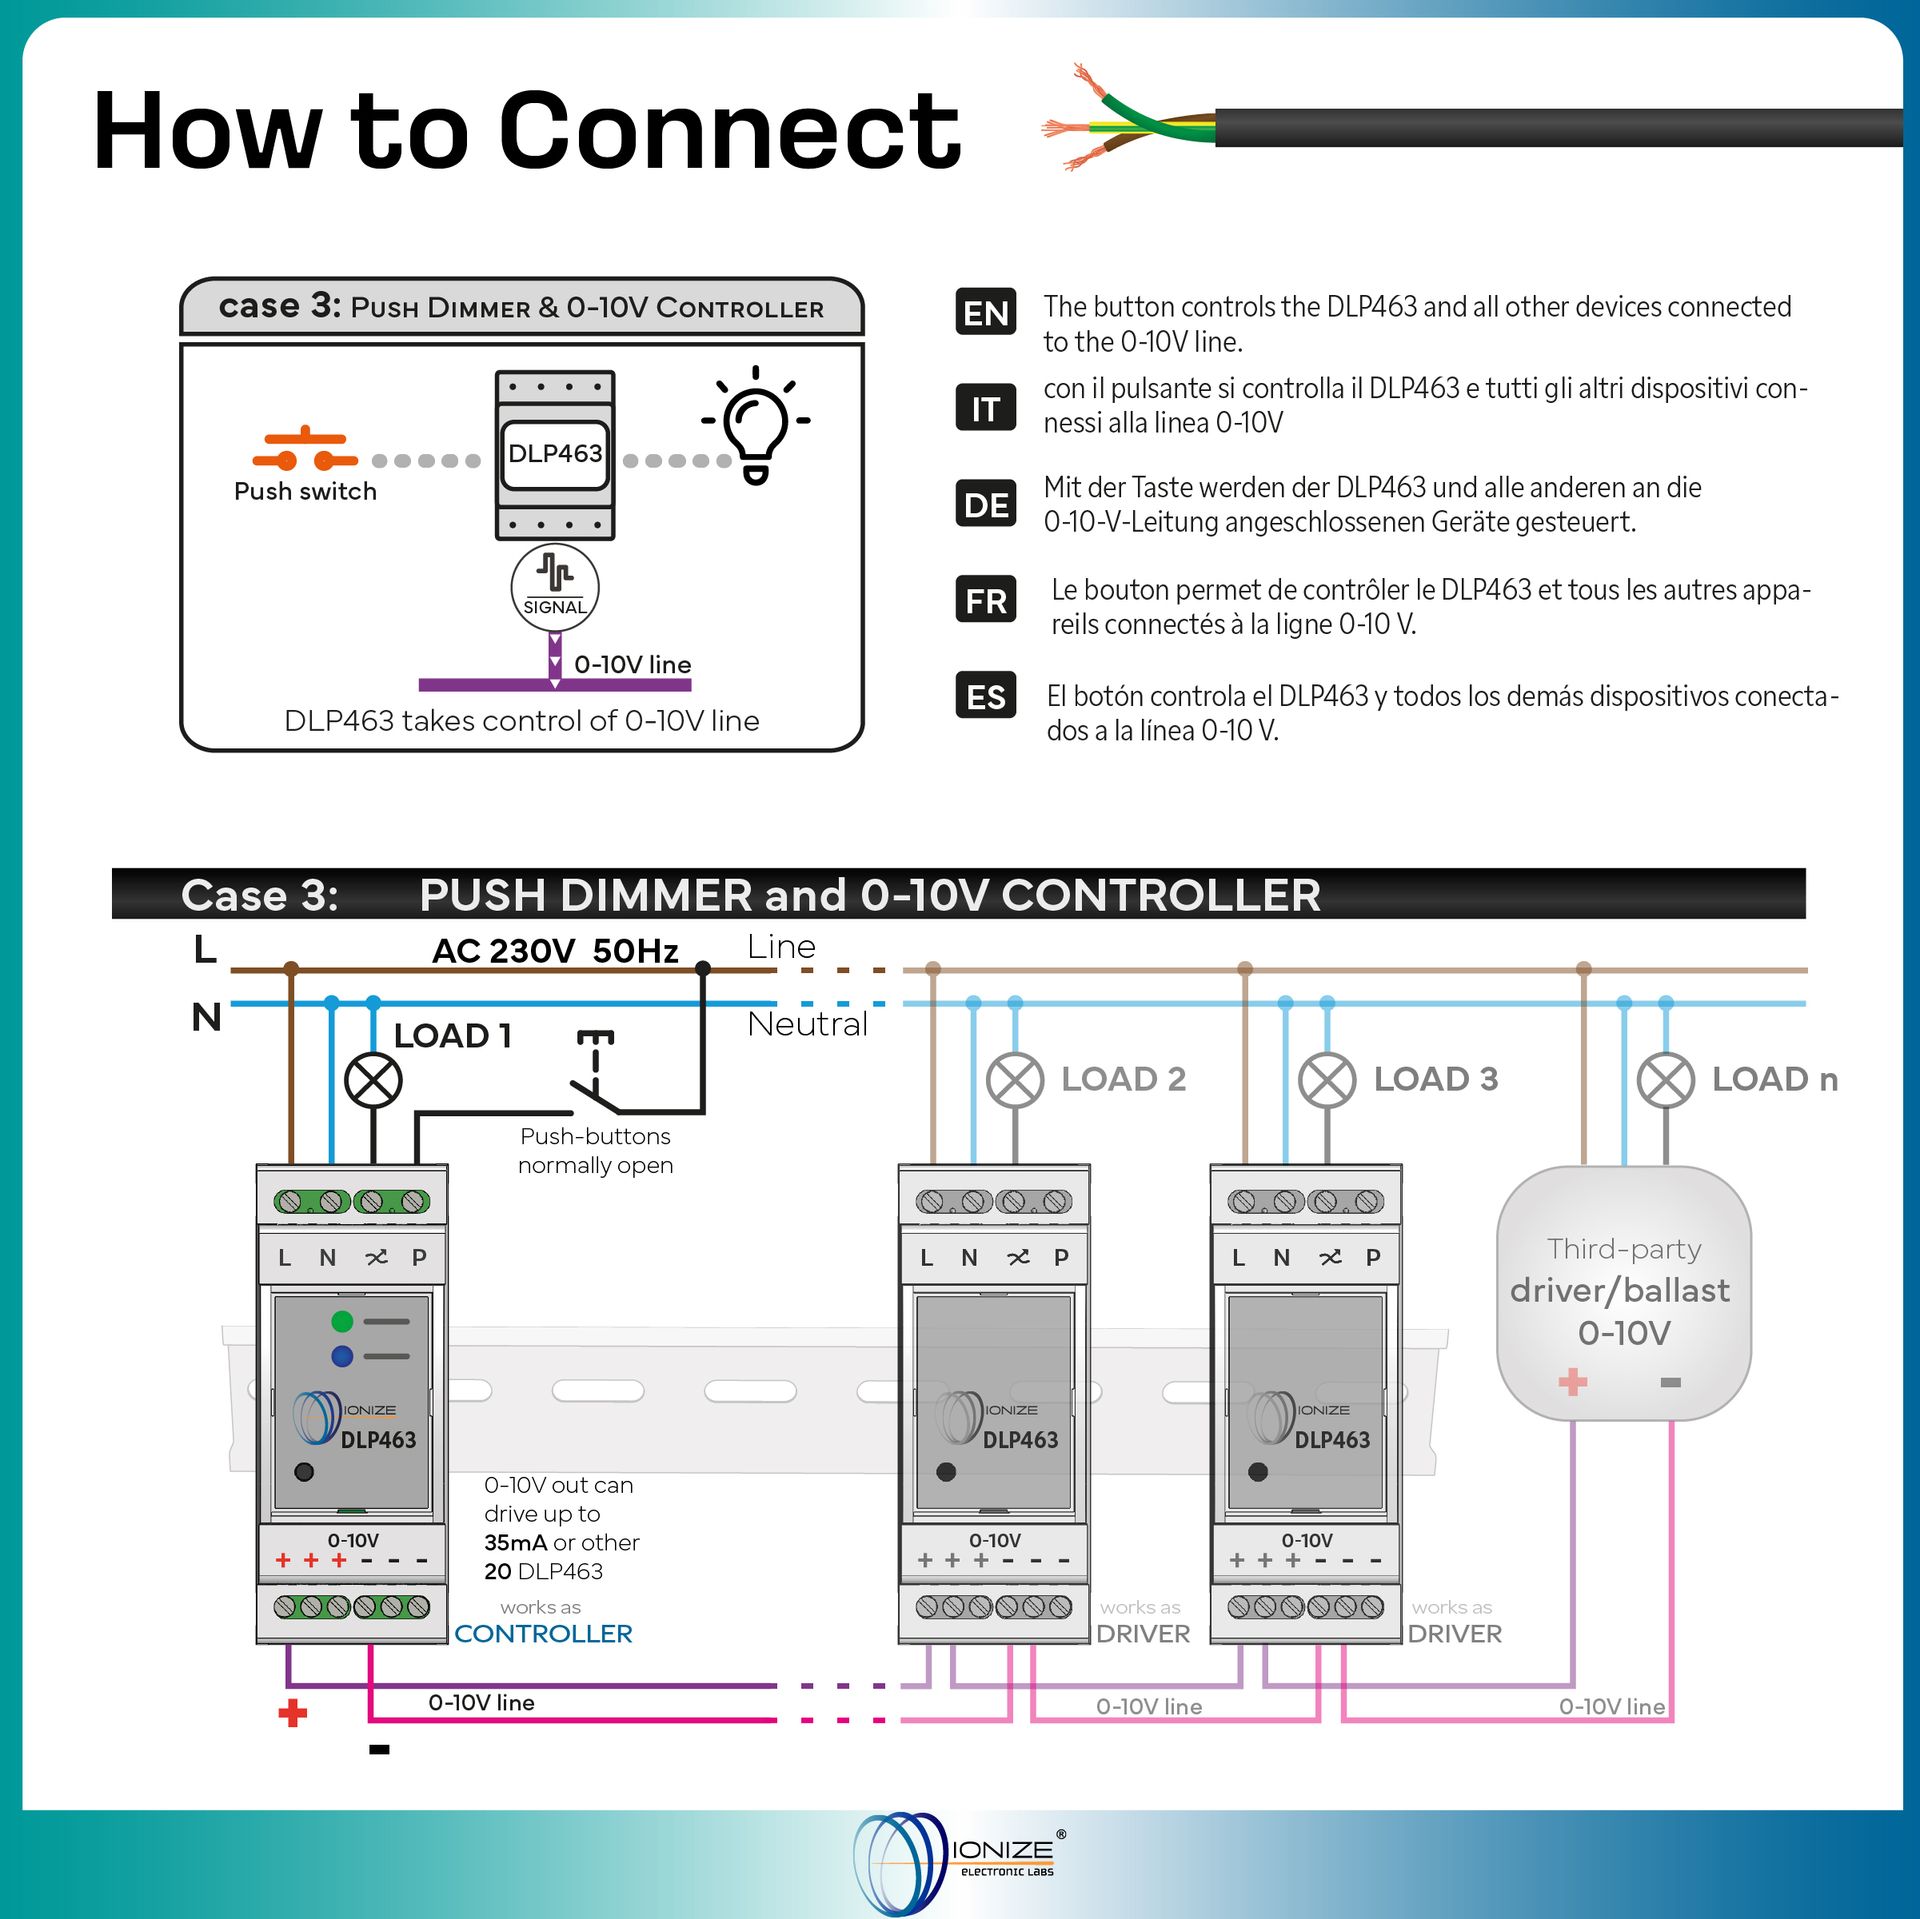
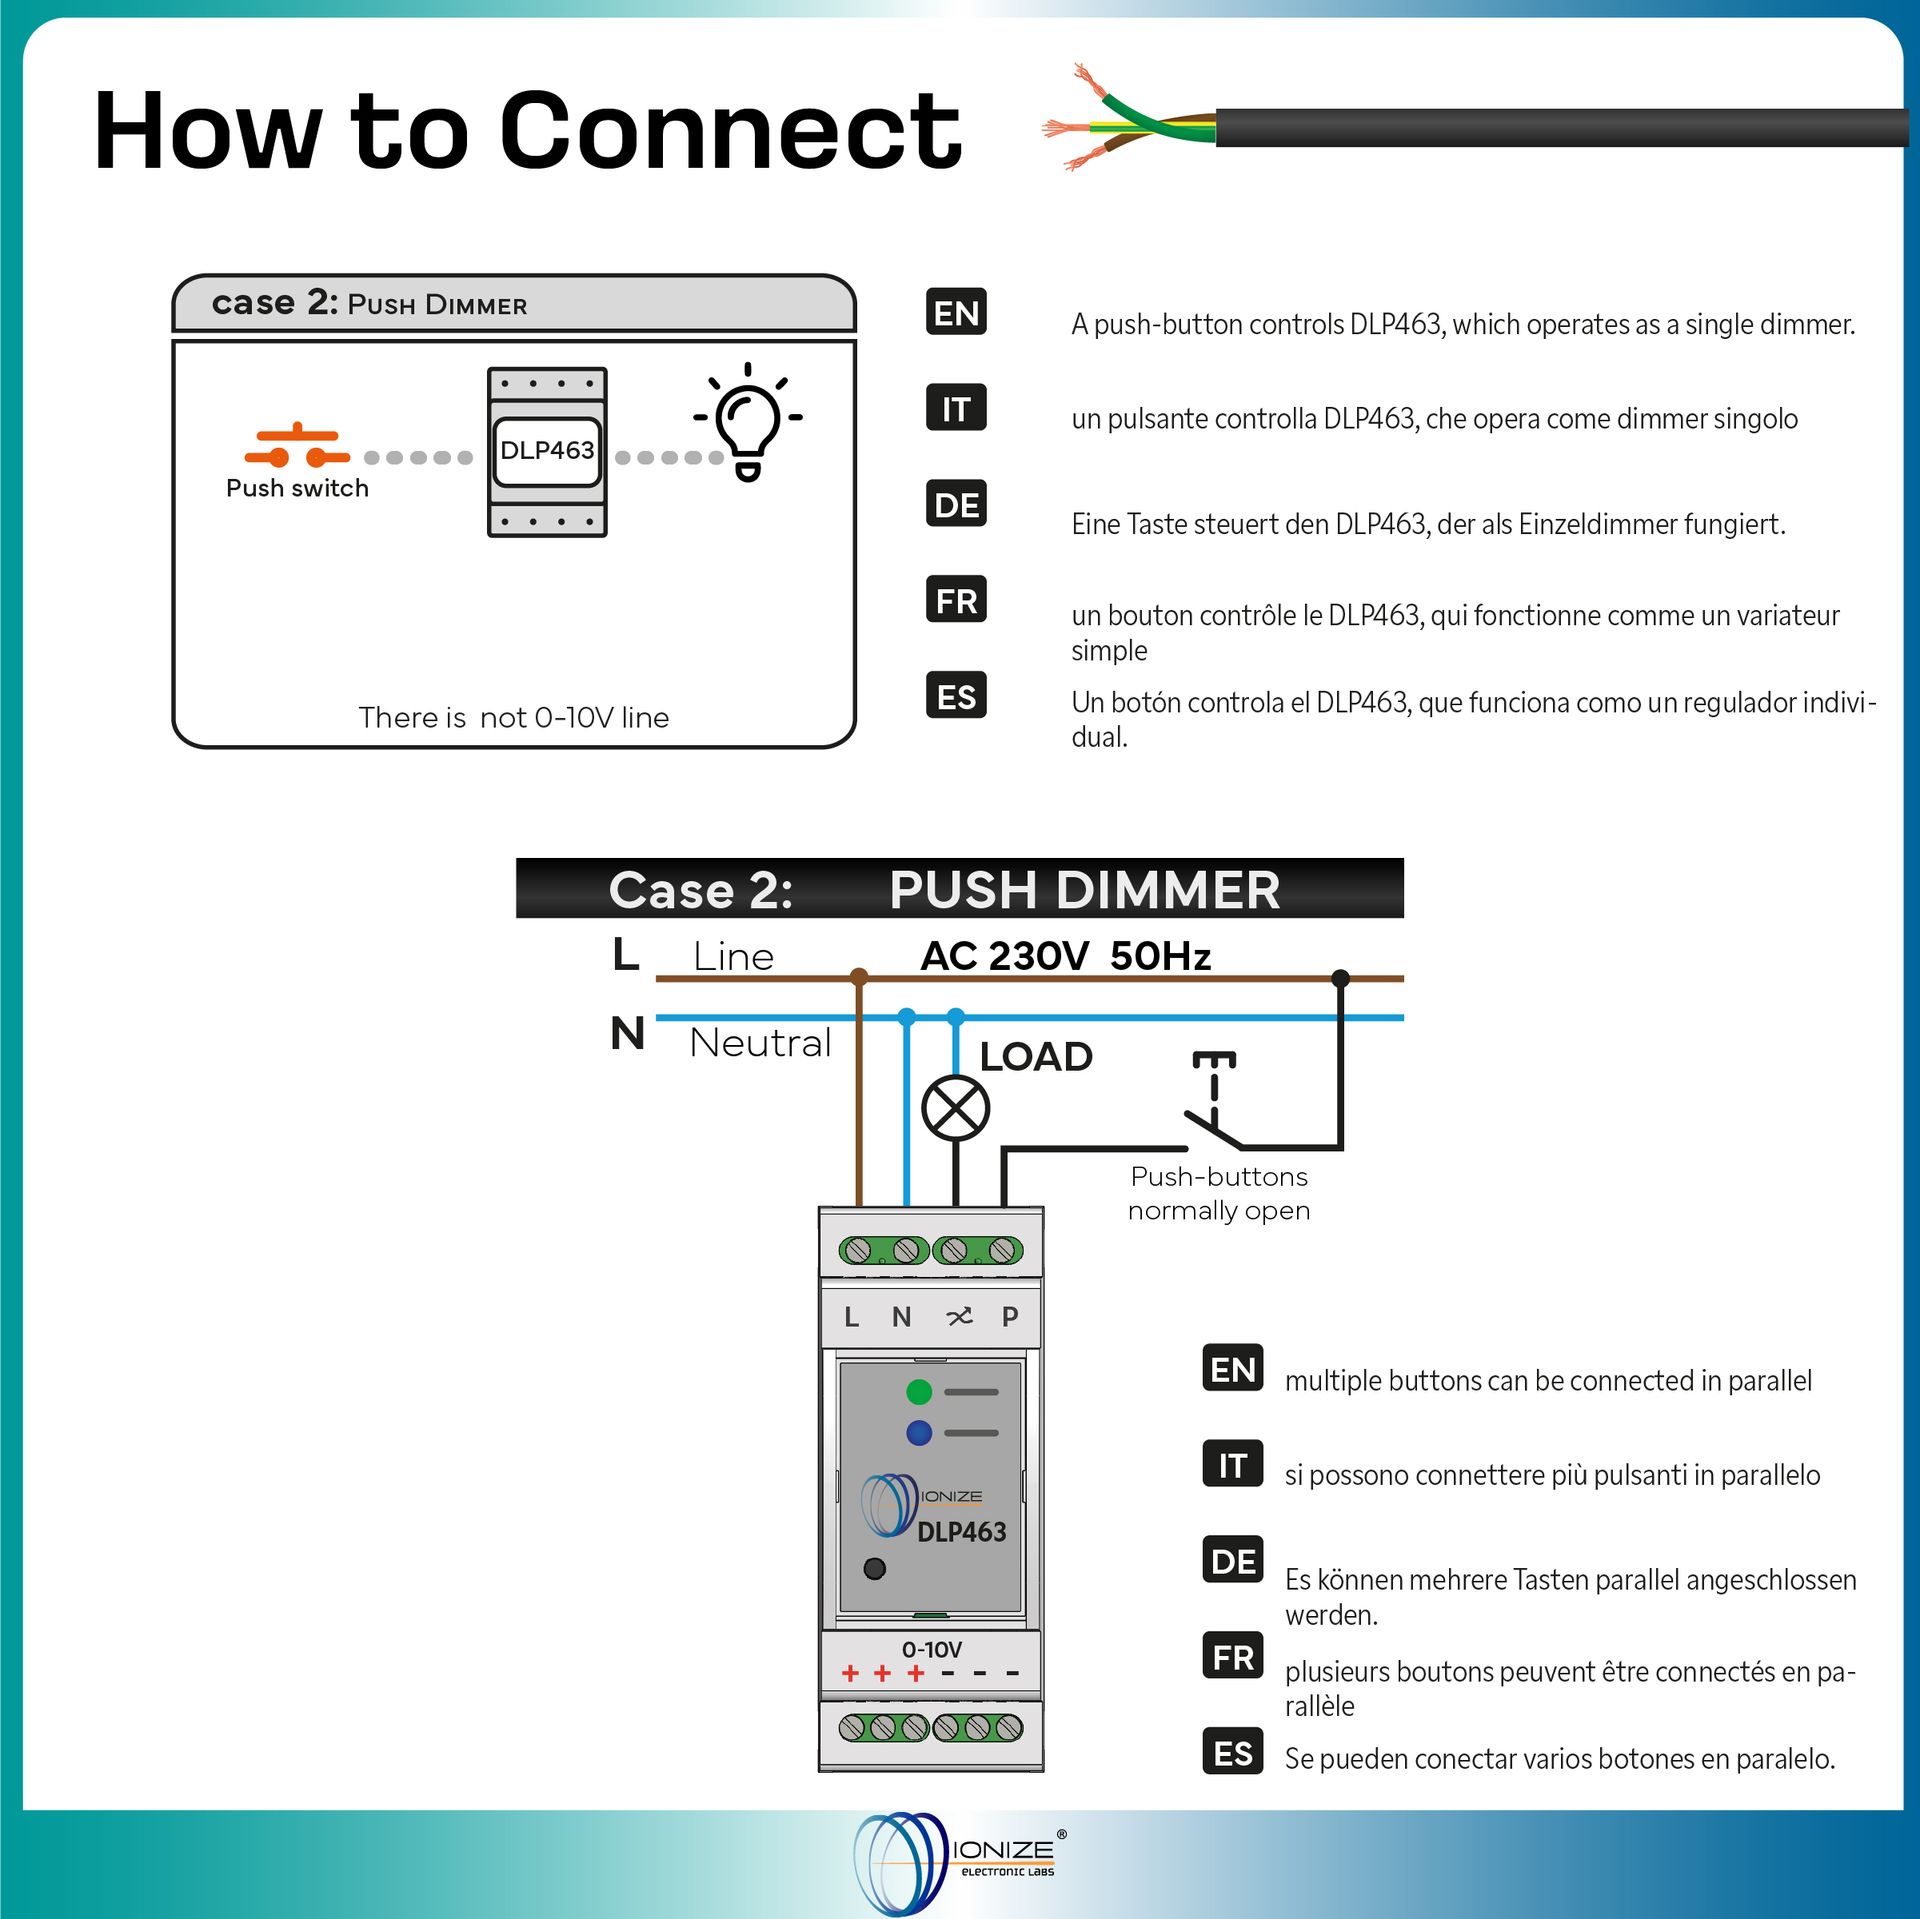
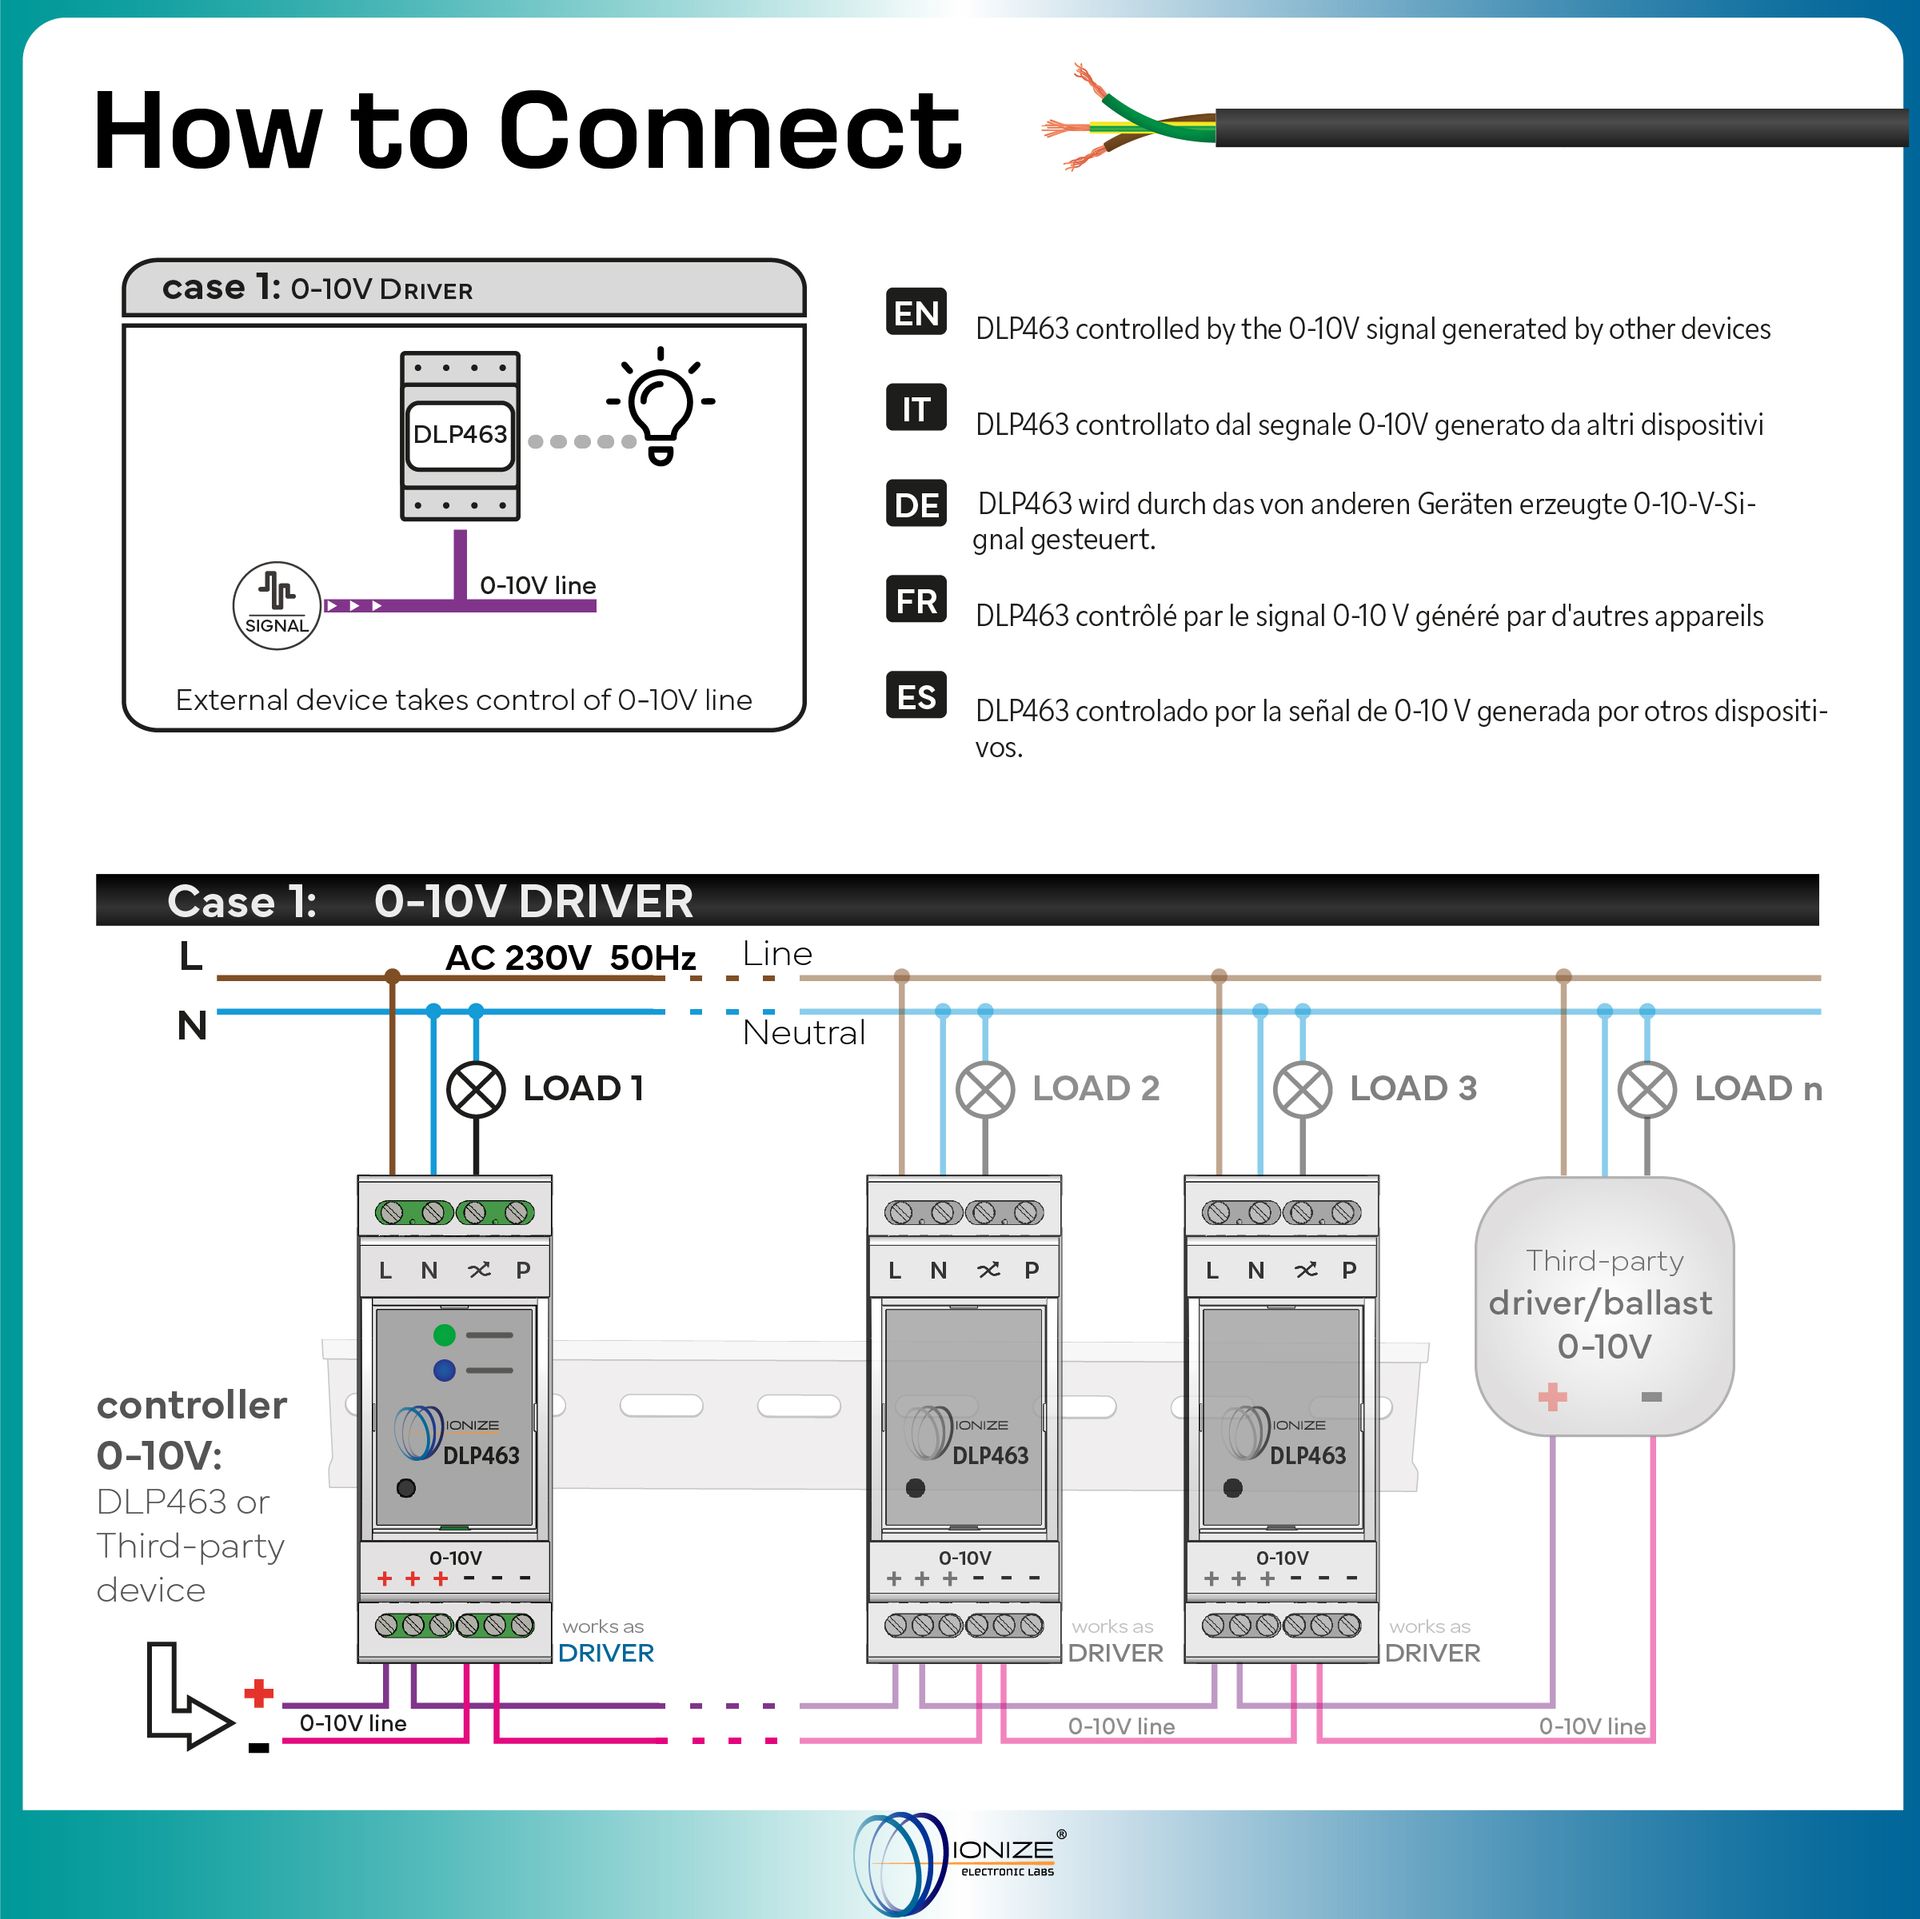
- 3 in 1 (Total Versatility): Can operate as a standalone Dimmer, Controller (Master) to generate 0-10V signals, or Driver (Slave) if controlled by an external signal.
- System Expandability: The device integrates both master and slave functions; by connecting multiple DLP463 modules via the 0-10V line, very high loads (Power Boost) can be managed while maintaining perfect brightness synchronization on all light points.
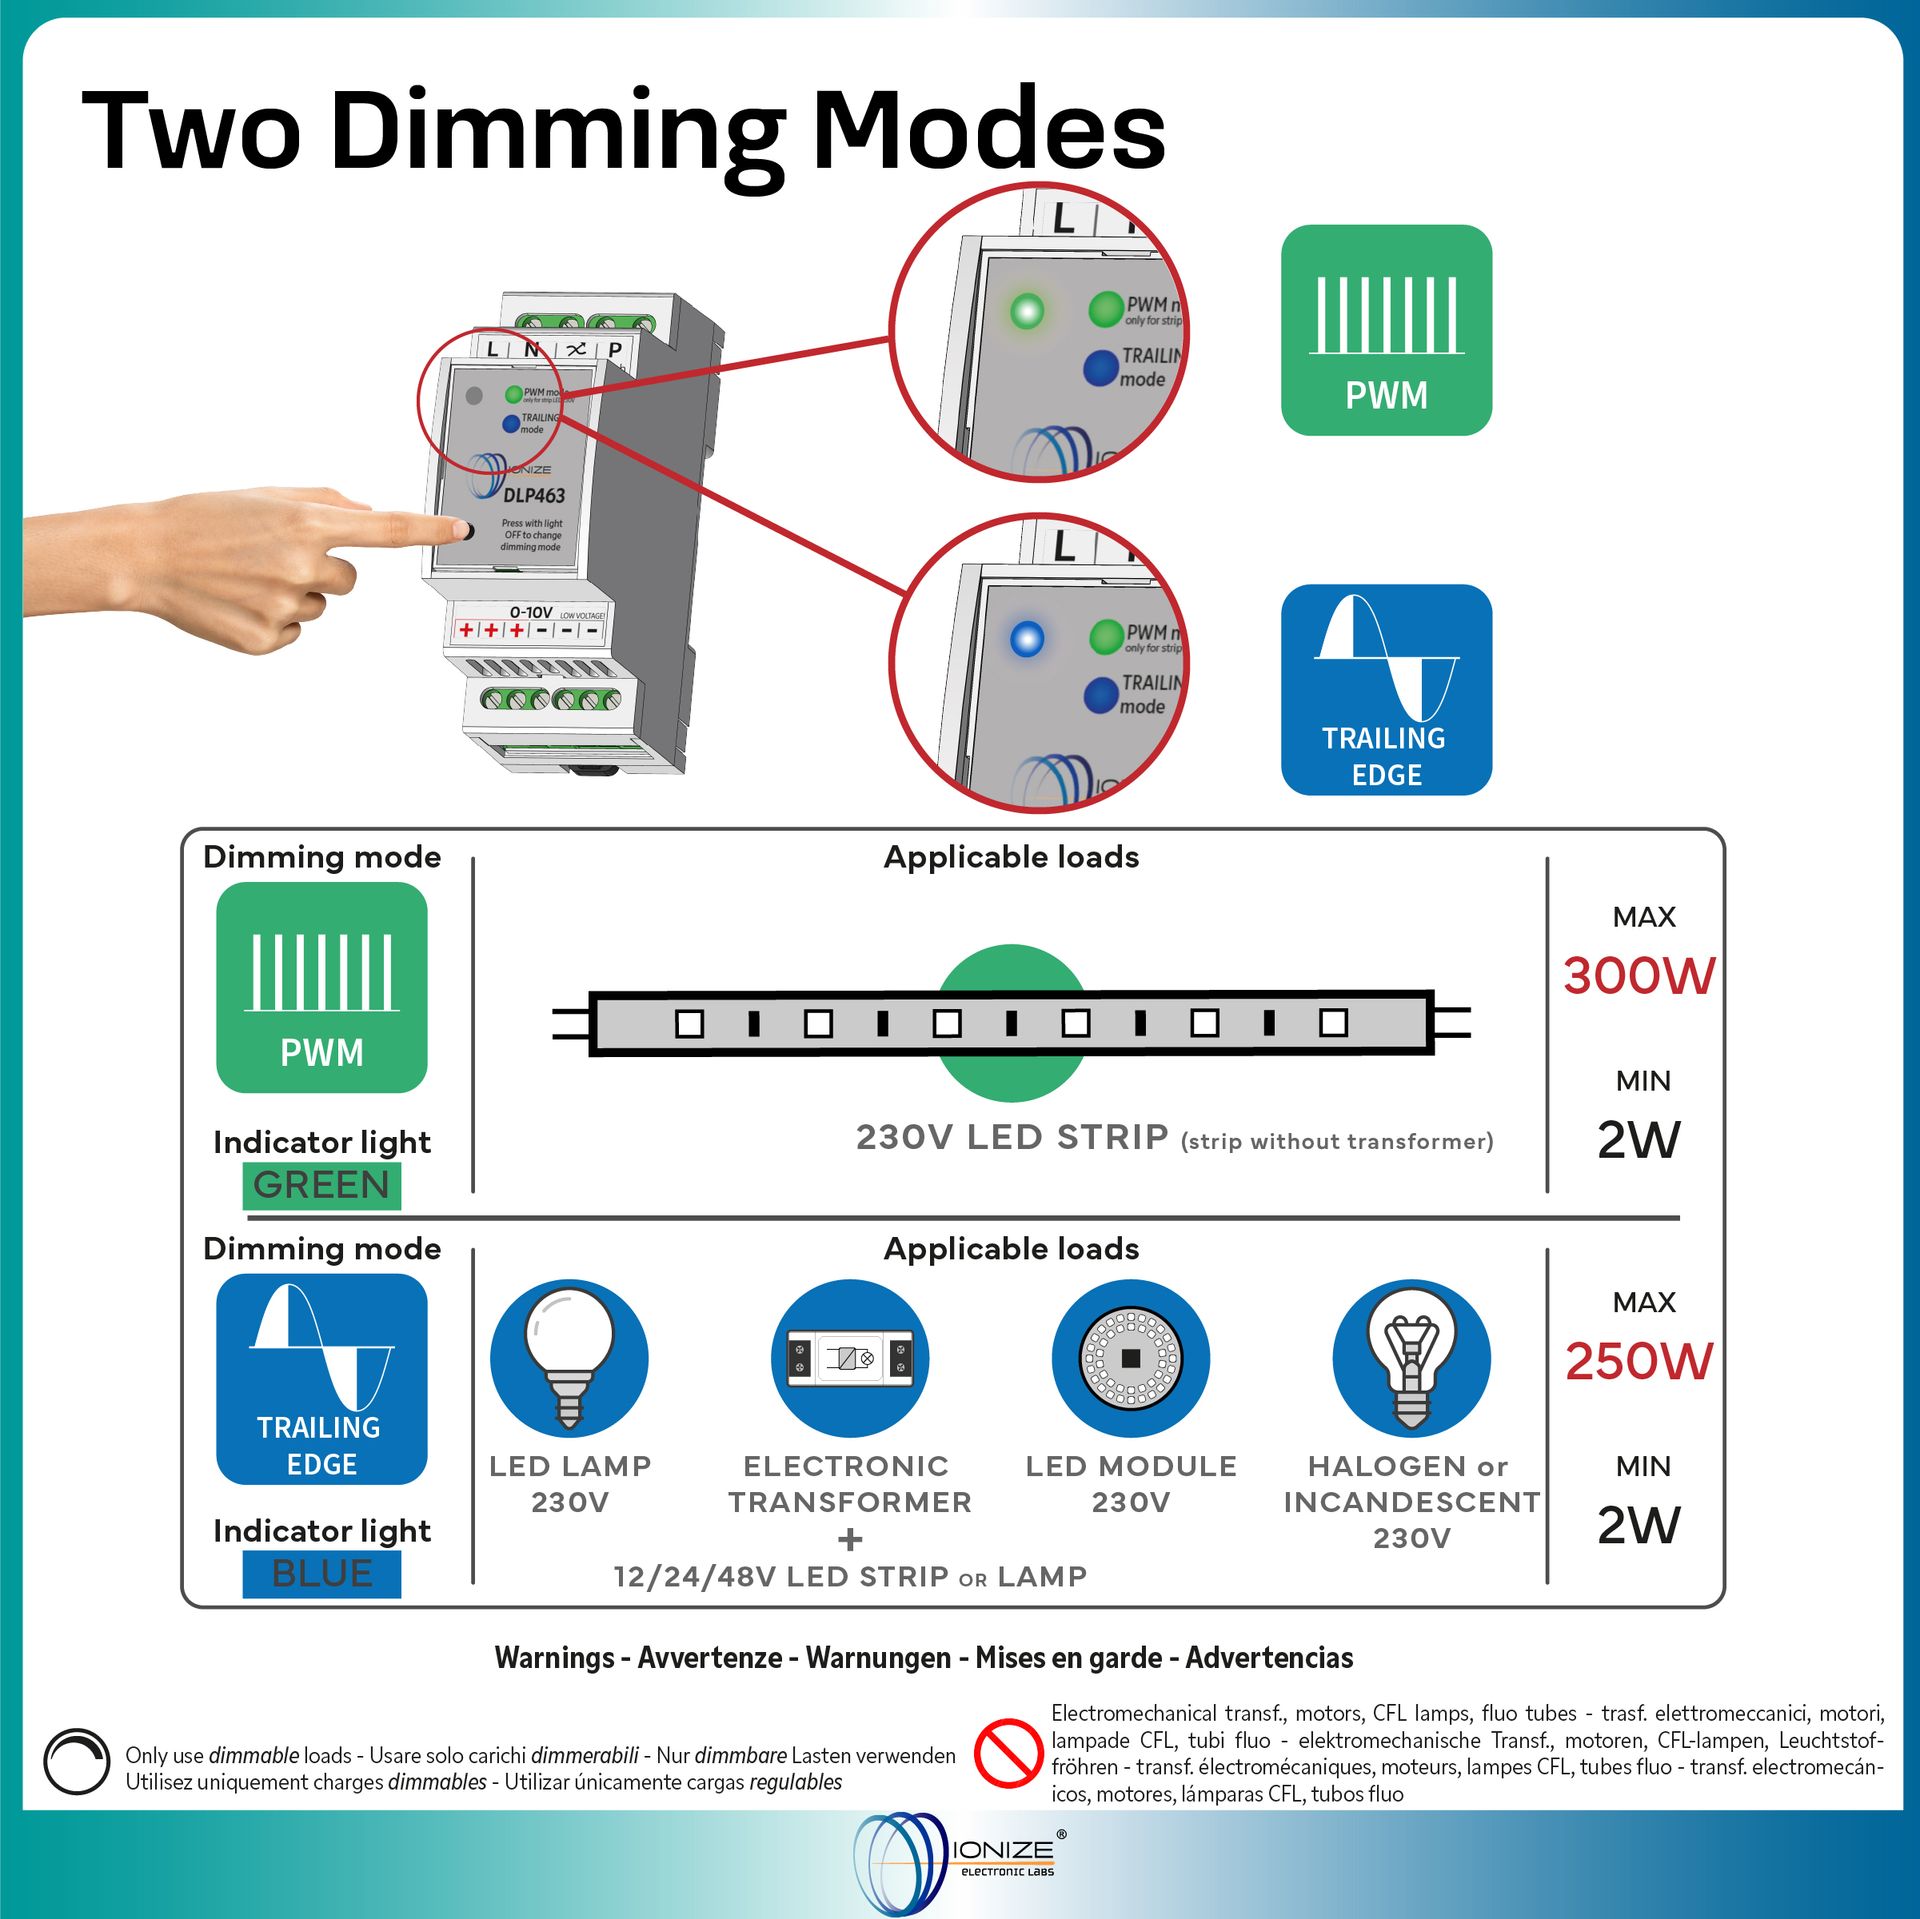
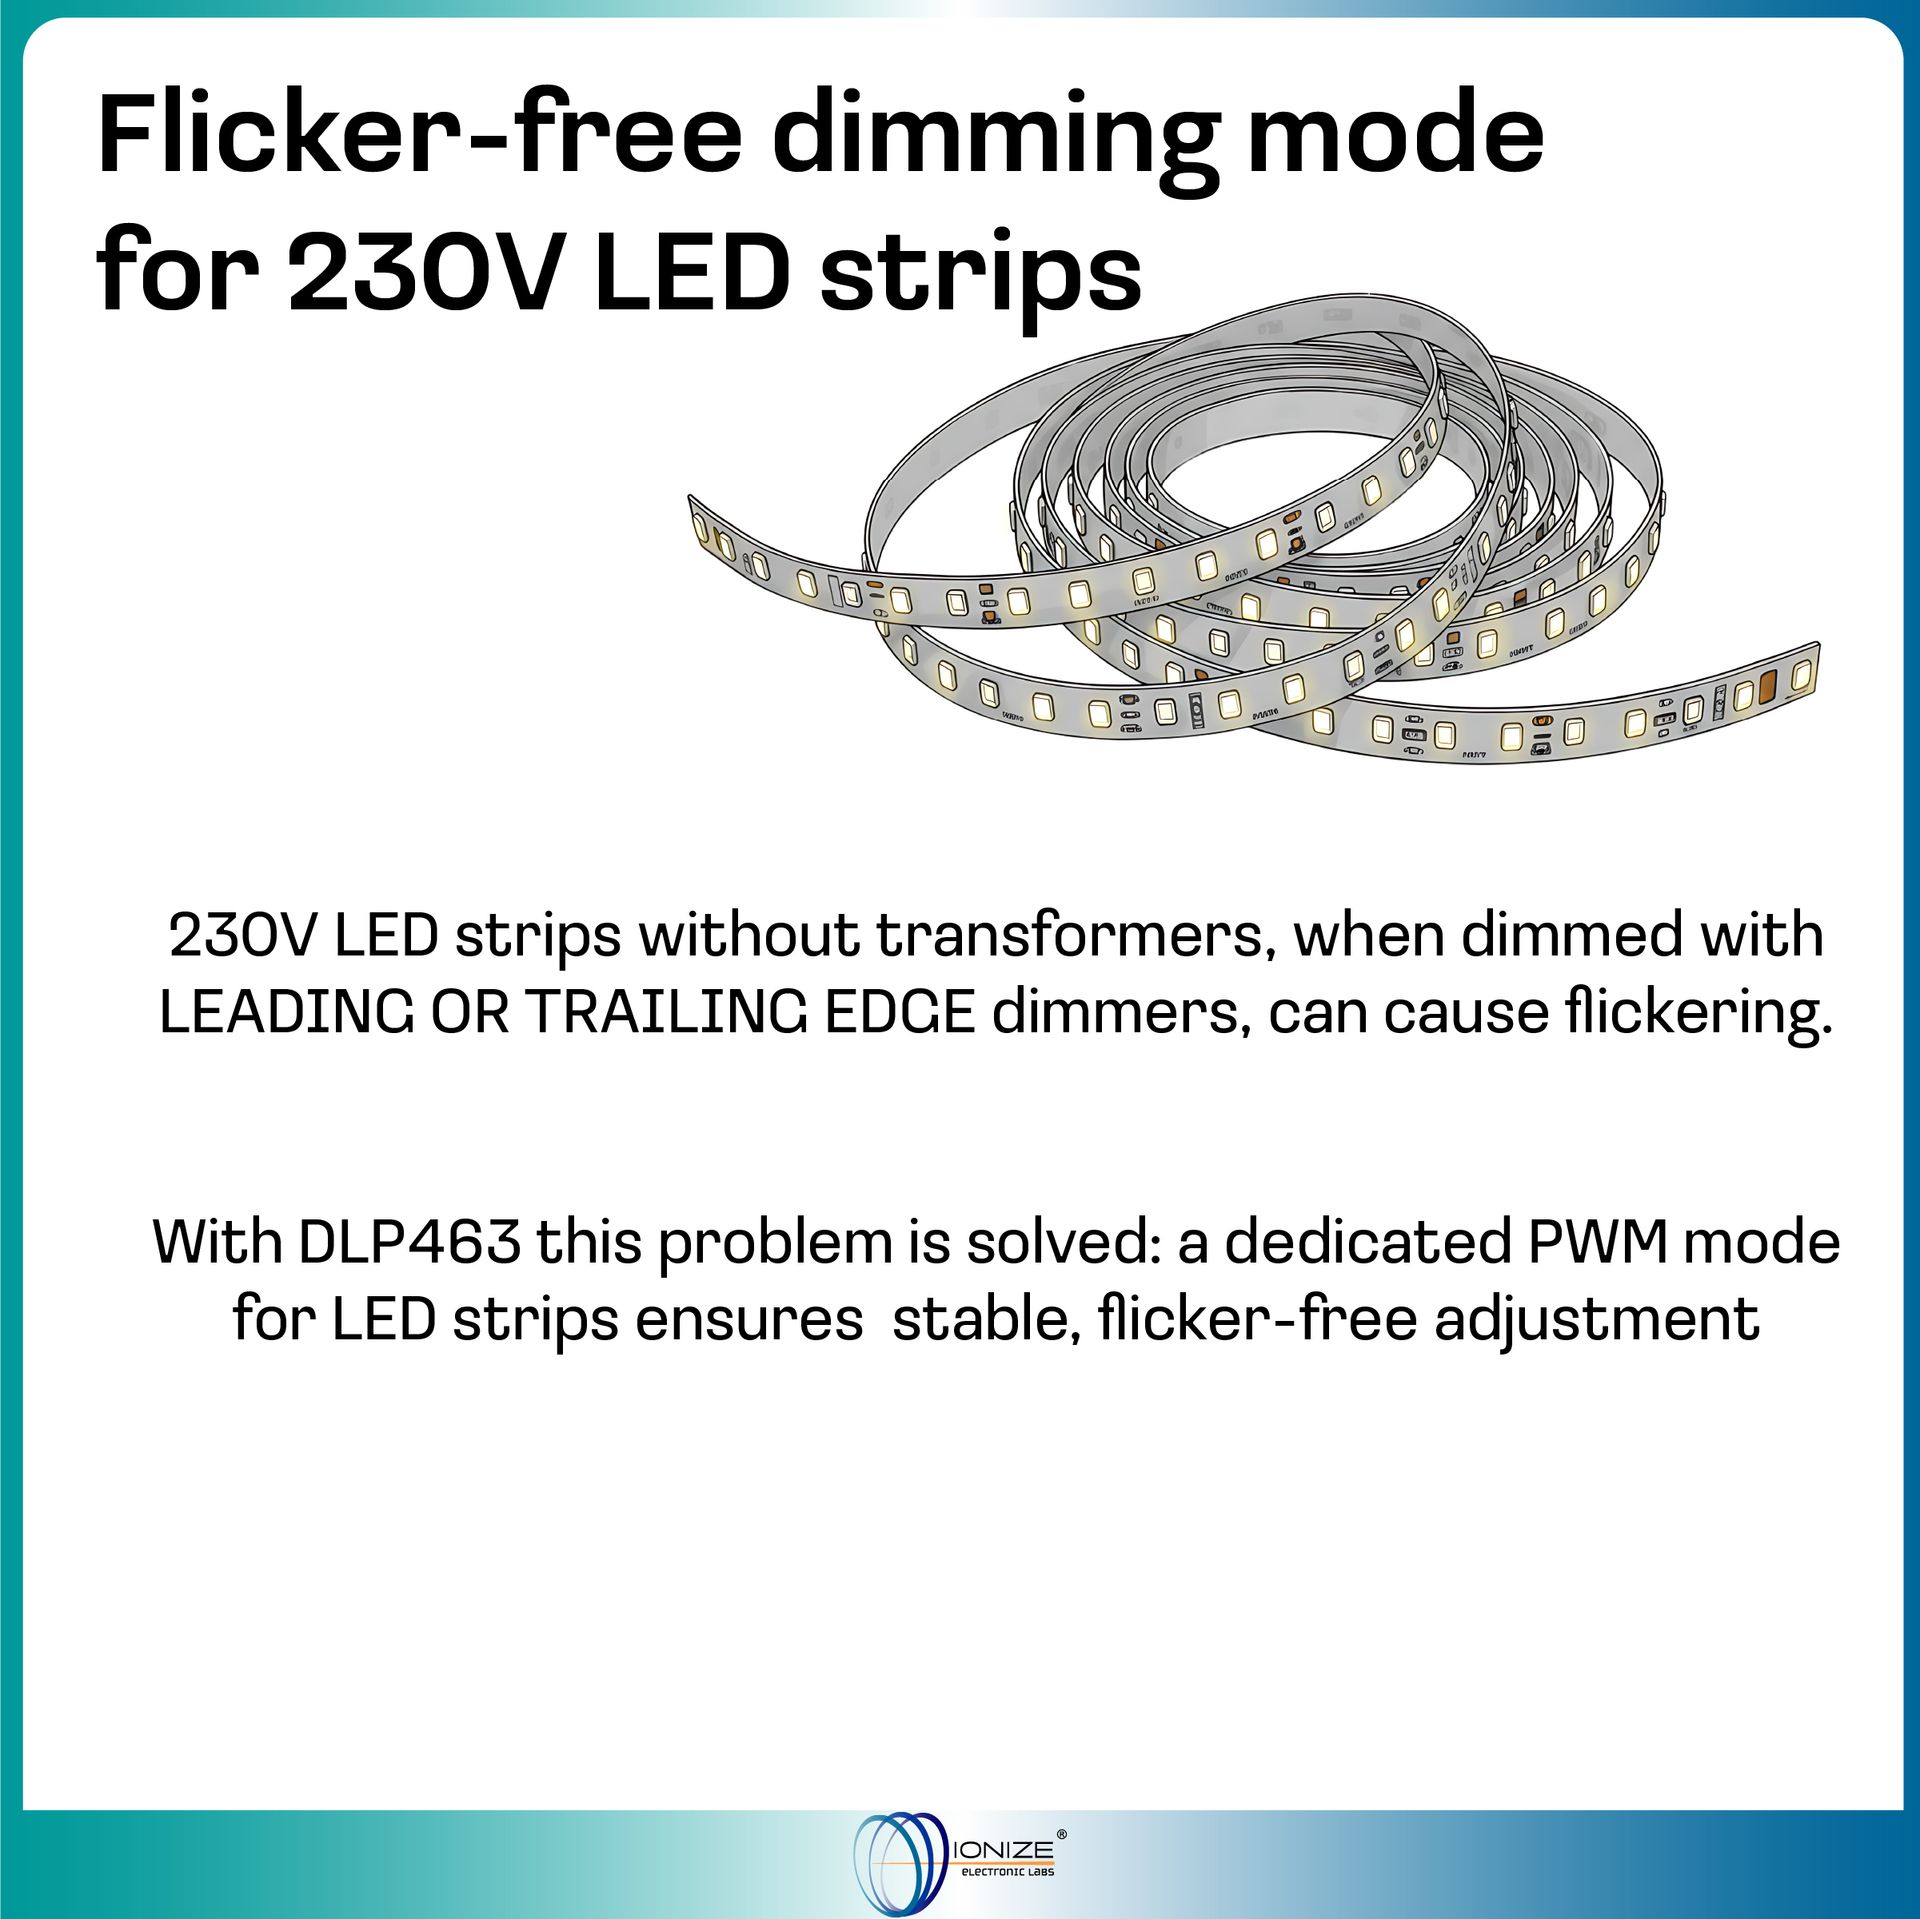
- Dual Technology: PWM mode specifically for 230V LED strips and Trailing Edge for other dimmable loads.
- Minimum Calibration: Allows you to adjust the minimum brightness to avoid flickering based on the connected load.
- Intelligent Memory: Configurable memory function to restore the last light level after a power outage.
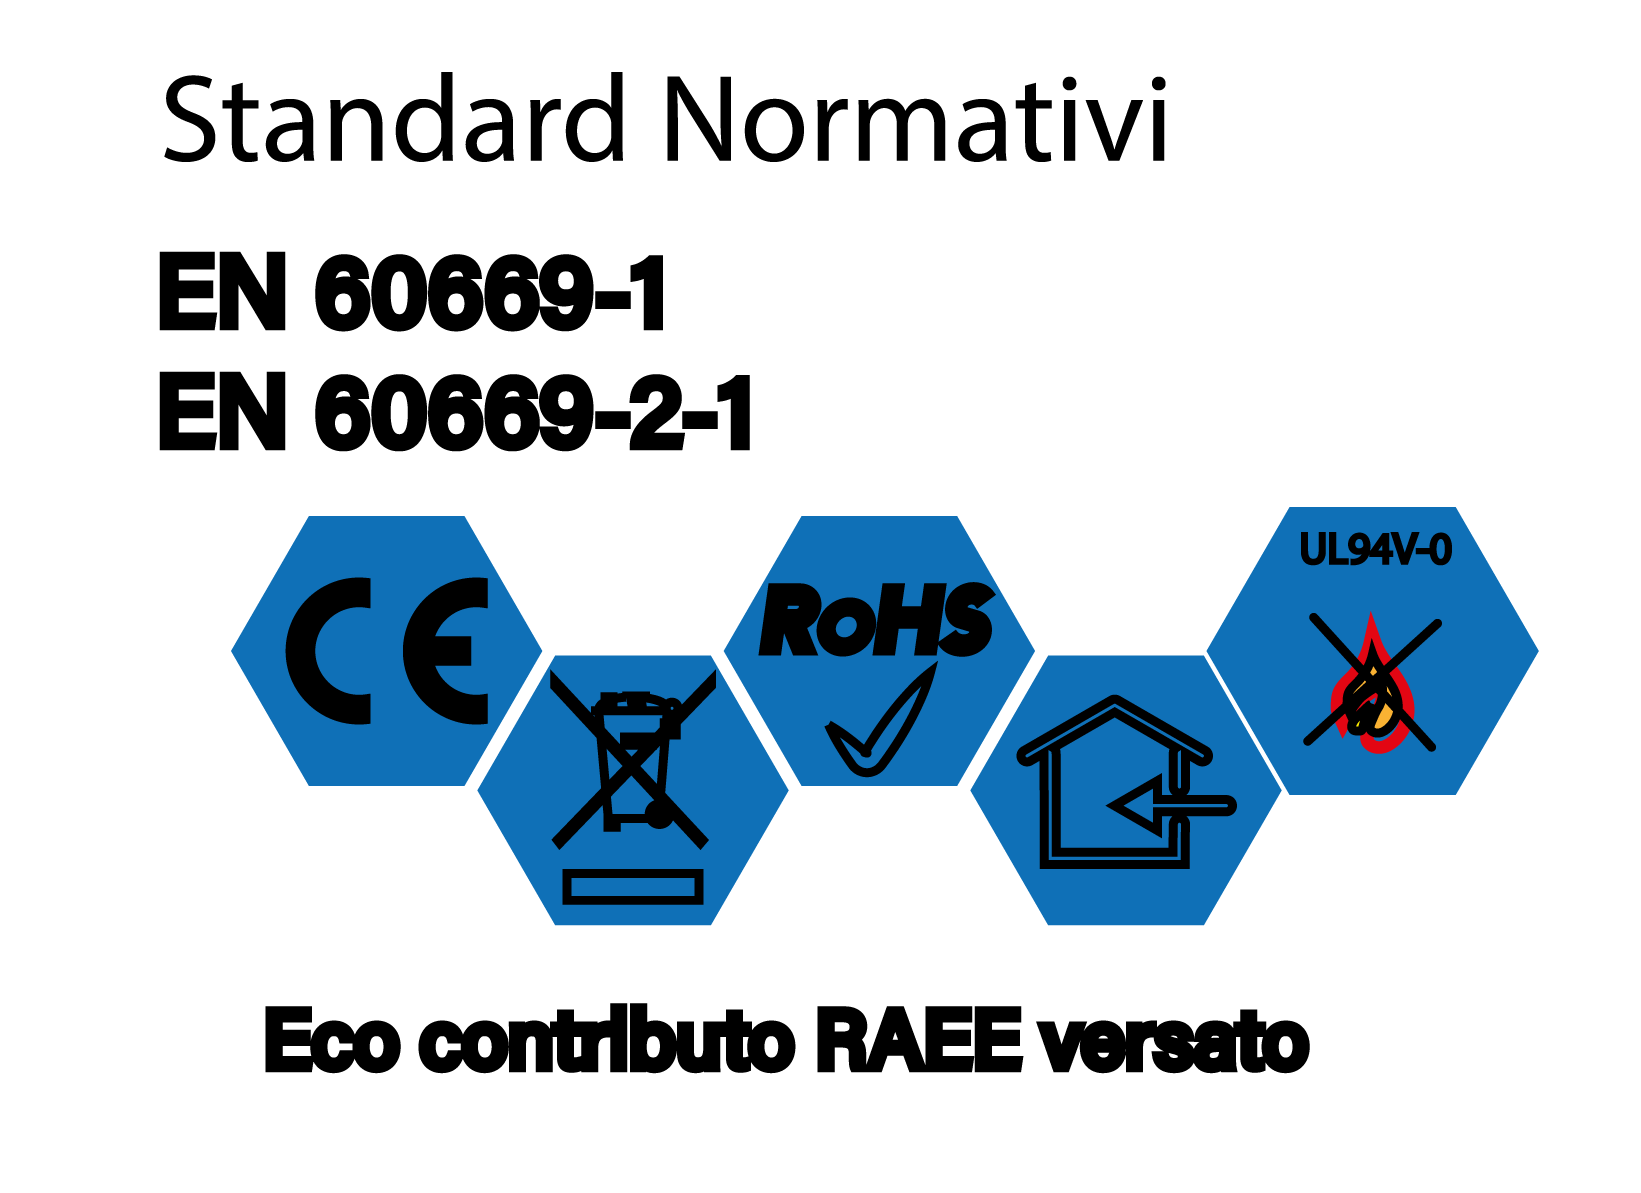
- Built-in Safety: Overload, overtemperature and short circuit protection; self-extinguishing plastic casing.
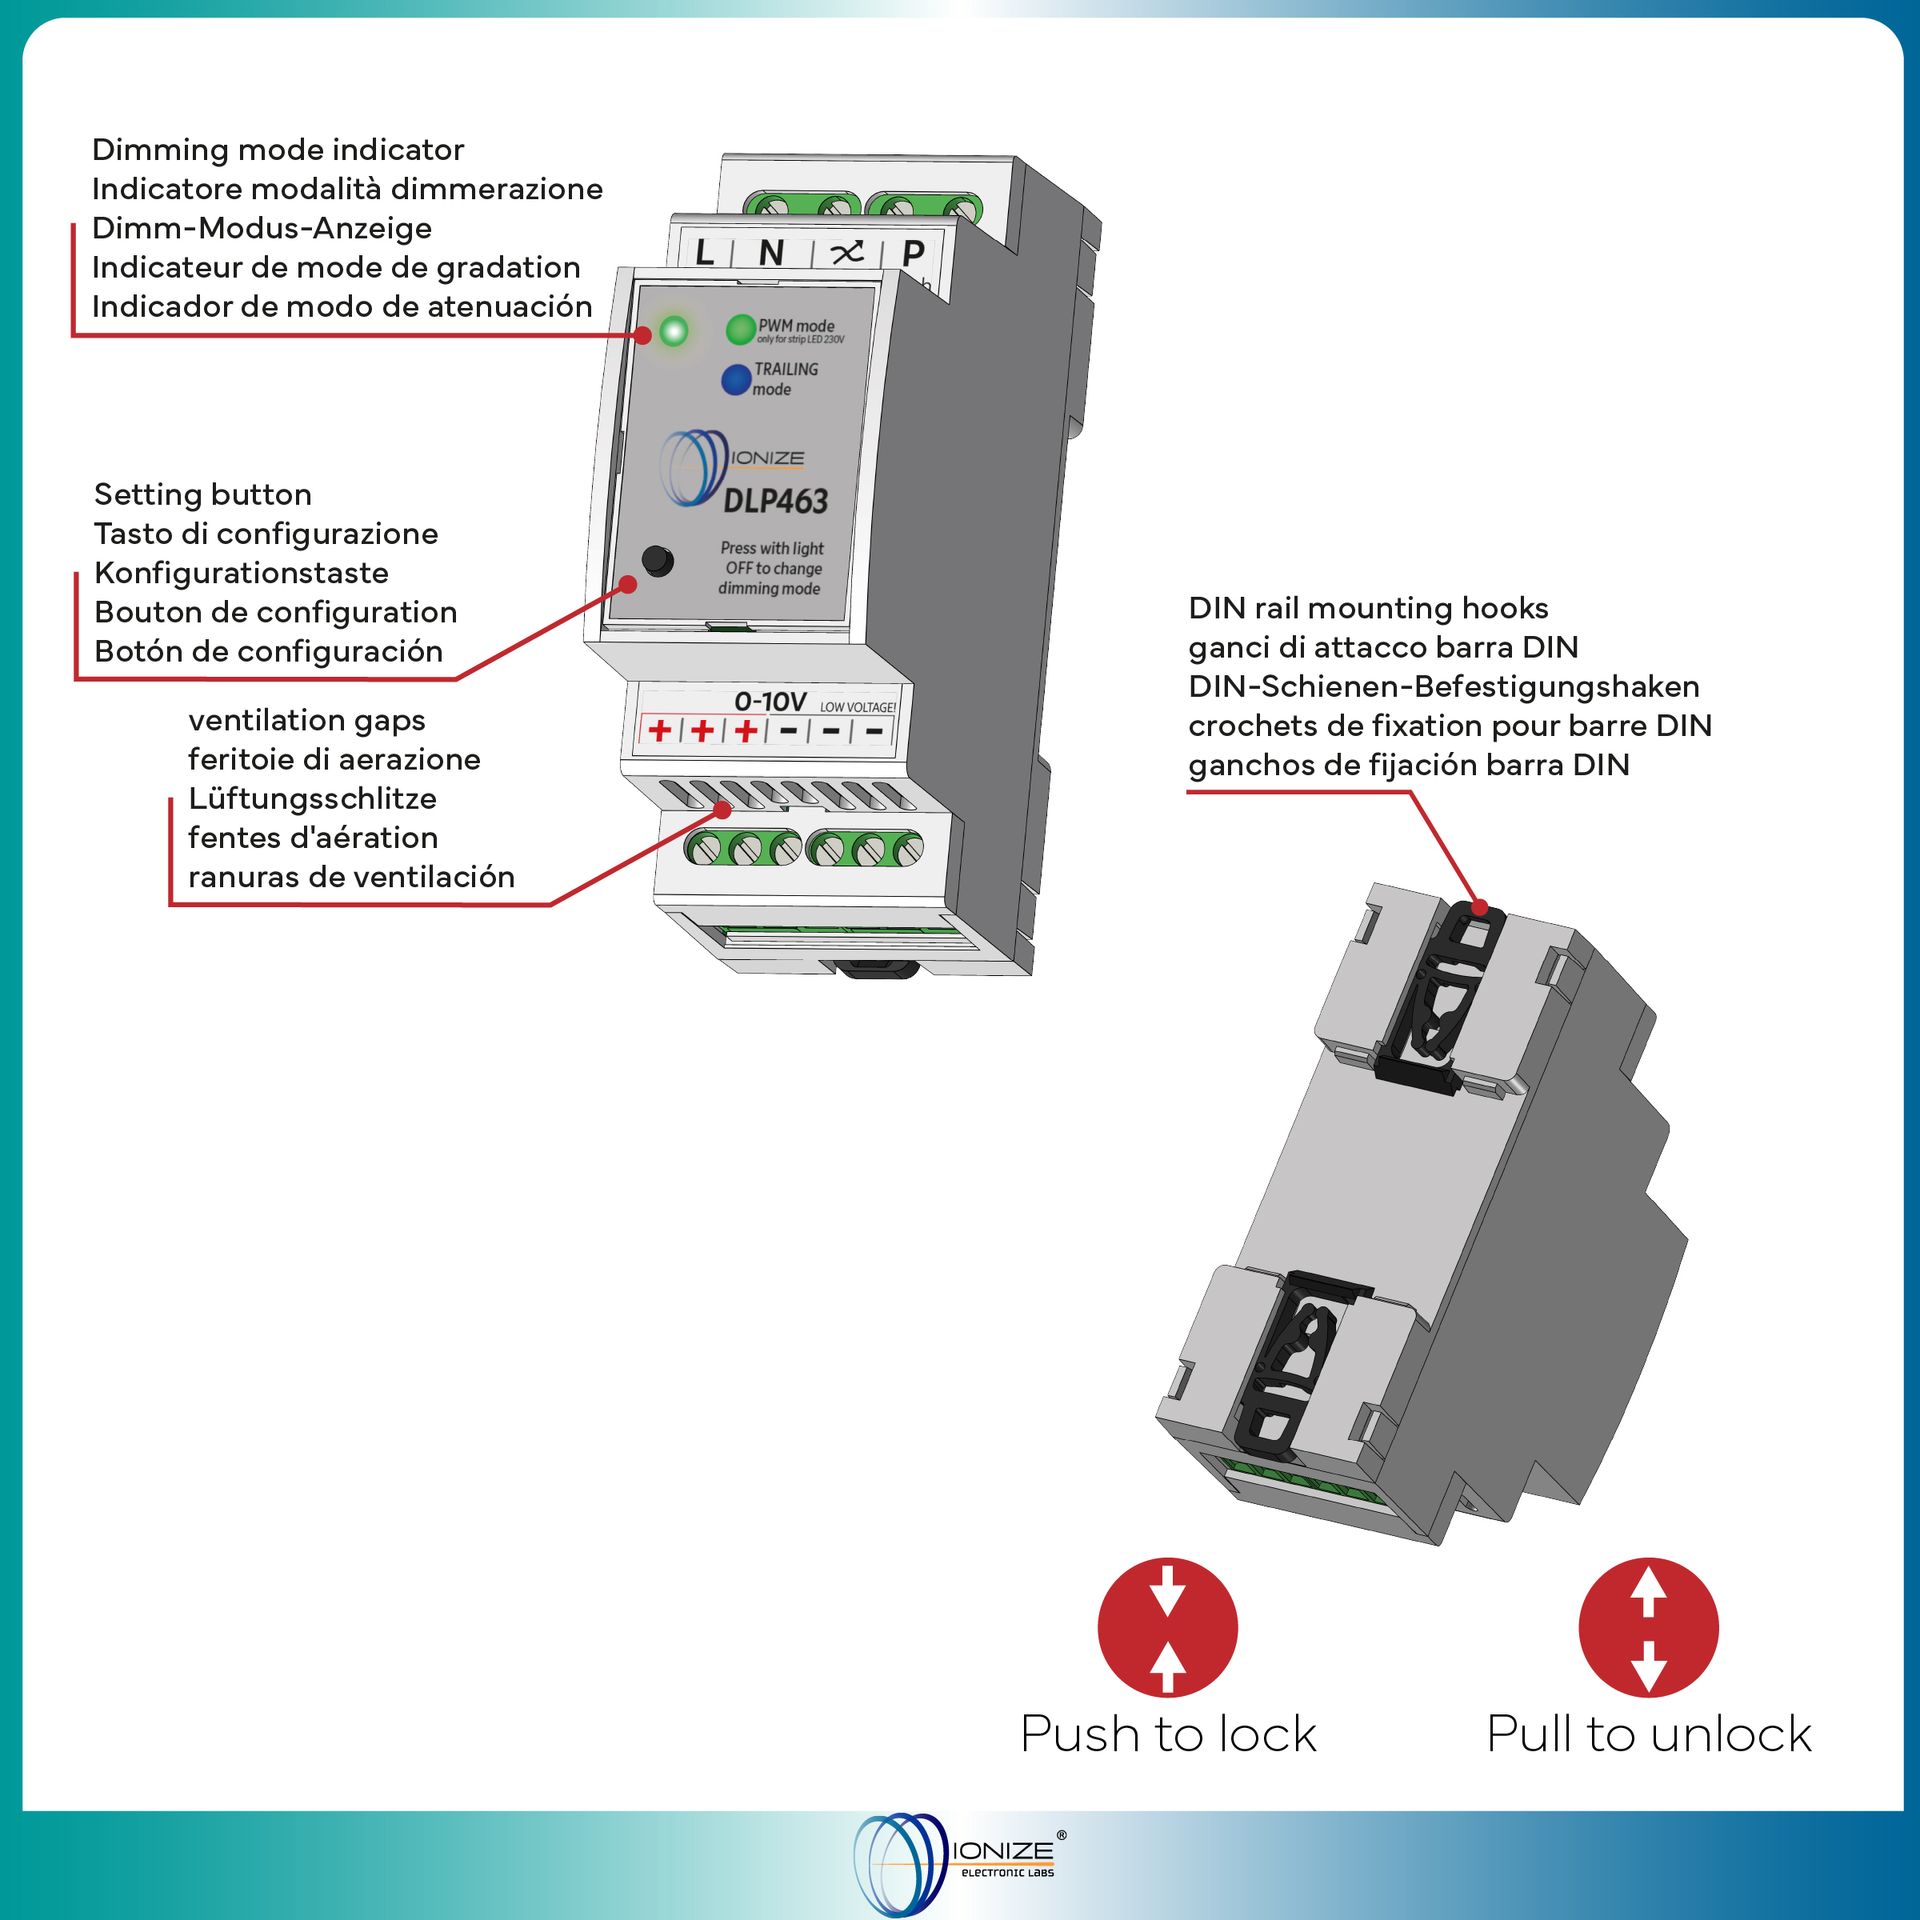
- Compact Design: Takes up only 2 DIN rail modules (36mm).
How the dimmer works
Default operation (without memory)

The first diagram refers to the duration of the pulse (with time on the x-axis).
The narrower, lined rectangles indicate a short pulse, the wider ones a long pulse.
The diagram below refers to the brightness of the lamp (brightness on the y-axis and time on the x-axis).
For each short pulse, the brightness always switches from the minimum to the maximum level and vice versa, without stopping at intermediate levels.
The first long press on the graph sets the brightness from the maximum level to the desired intermediate level.
The second button "changes the direction of dimming" and in this case increases the brightness back to the maximum level.
Memory operation
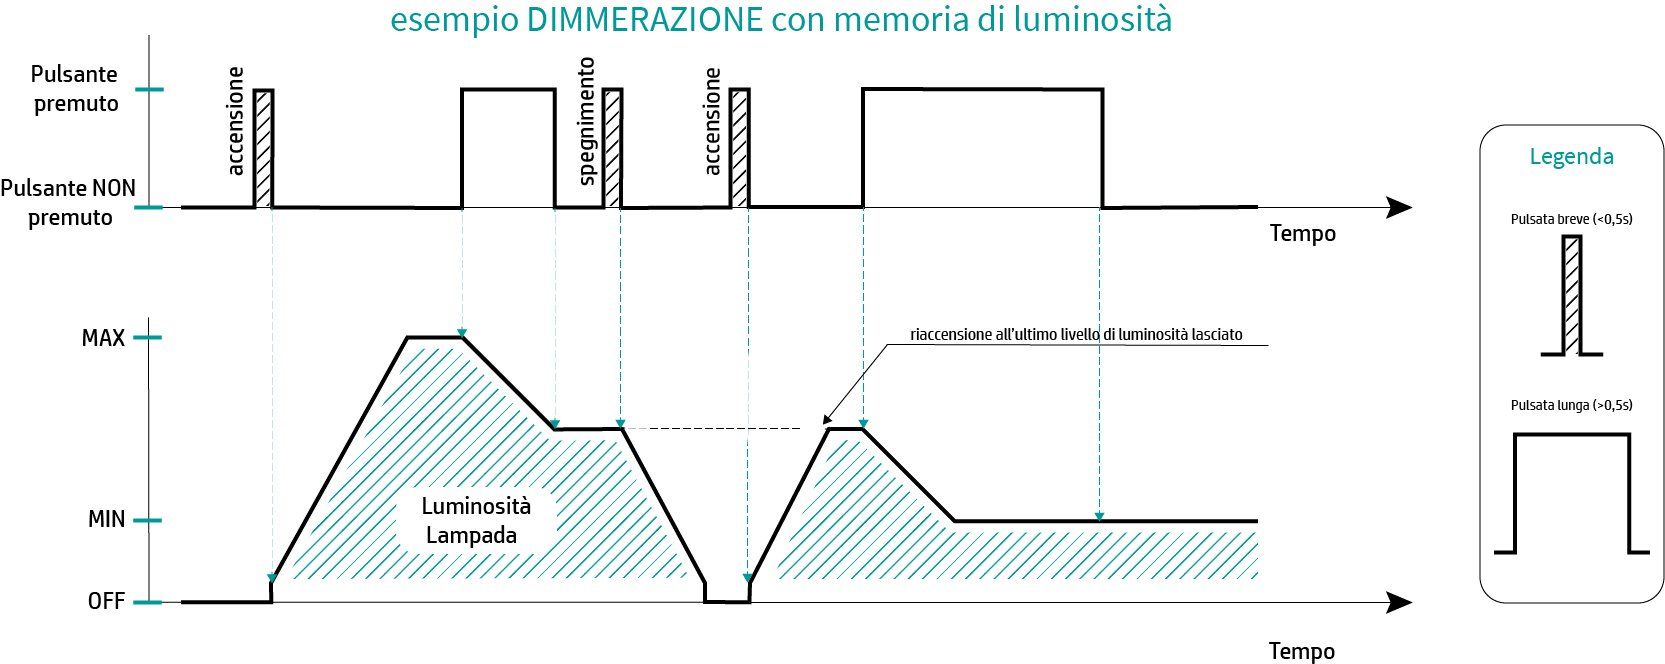
After a short press of the button, the light turns on at the maximum level.
The user then presses a long button to dim the light and releases the button at the desired brightness level.
This level is consequently the stored level.
Another short press by the user turns the light off, while the next one turns it back on at the last selected brightness level (memory function).
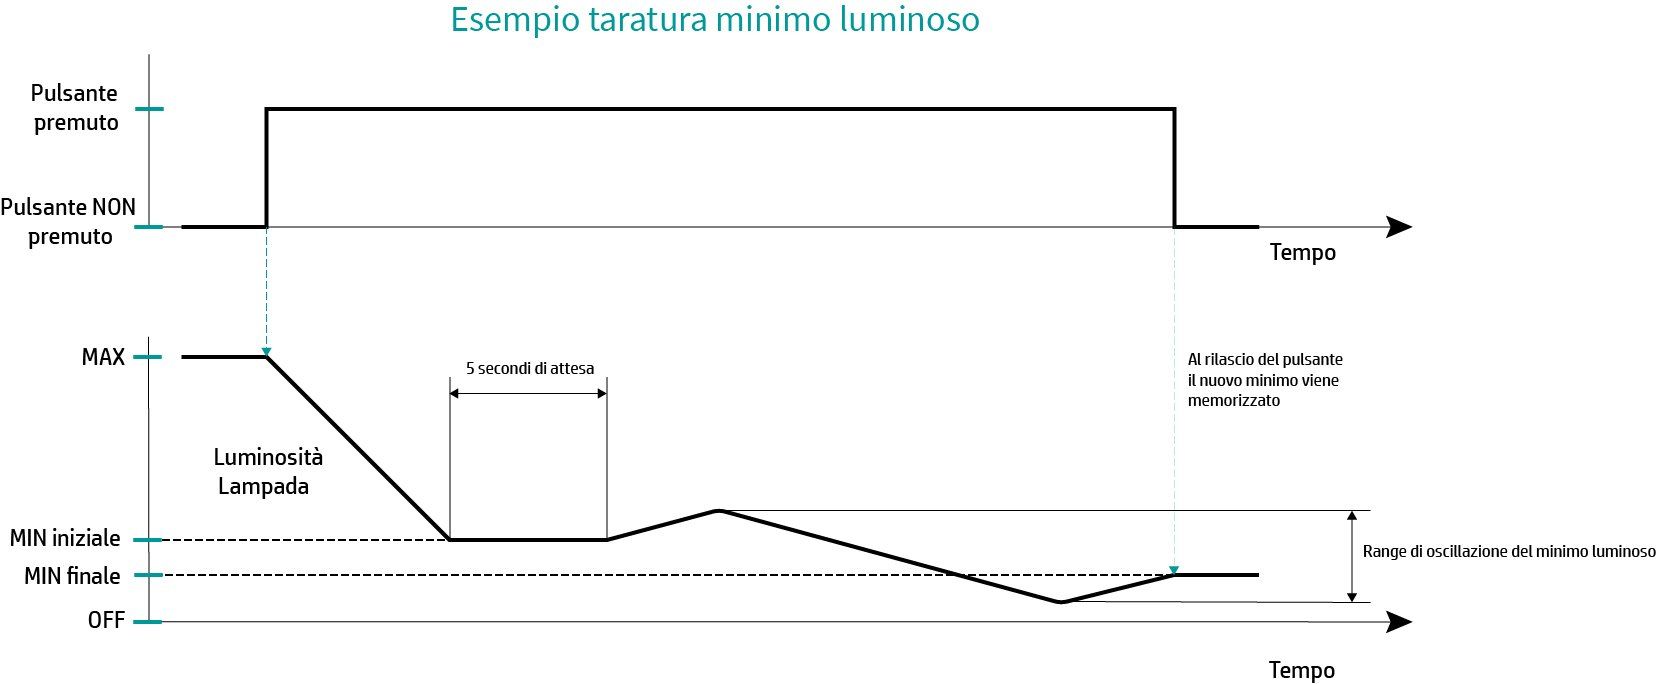
Idle calibration
DLP463 allows you to calibrate the minimum brightness directly from the button on the front of the device.
Each type of lamp may require a different minimum brightness, and this can also be useful to avoid "flickering" problems.
To calibrate the minimum brightness, you need to press and hold until the brightness drops to the current minimum.
Once the brightness has reached the minimum, you need to continue holding the button down for another 5 seconds or so.
At this point the brightness should start to "oscillate" (between 0 and 30%).
To set the new minimum simply release the button at the desired brightness level.
Frequently Asked Questions